Undoubtedly one of the most commonly asked questions put to us, the ‘how do I look after my Giuliano Tyre Machine’ request is one we actually love to answer. In any garage, it is a very real but very unfortunate fact that the tyre fitting machine can be the least considered item of equipment when it comes to love and care.
So, when someone asks ‘What should I be doing?’, it is music to our ears. There is no doubting the positive effect routine maintenance can have to the life and reliability of a tyre changing machine. It is a complex collection of mechanical components, including pneumatic ones, that will always need some attention.
It is easy to forget that your own time is not free, and sometimes it is better value to pay an expert to do what they do every single day and are vastly experienced in, and put your own efforts to more productive use.
However, it is fair to say that everyone who owns a tyre machine is going to be mechanically minded, so given some guidance, there really is no reason the maintenance and servicing can’t be done in-house.
|
Task / Item |
Explanation |
What To Do |
Frequency |
|
Oiler (Lubricating Bowl) |
Most lube bowls are located on the side or at the back of the machine. This incredibly vital component will ensure the lubrication of all moving parts within the machine, including seals contained within the various pneumatic cylinders that feature on all tyre changers |
Unscrew the ‘bowl’ (be careful if it is tight, if you use mole grips or similar you risk causing damage), and fill with a standard, thin air tool oil. You can then adjust the ‘flow’ or drip of that oil into the machine by pressing the bead breaker and ensuring a drop of oil is released. If it isn’t flowing, or is flowing too fast, simply adjust the screw at the top of the bowl. |
Every 2 weeks to every 2 months (dependent on volume of use) |
|
Water Trap |
Most machines should contain another bowl, next to the lubricator, which collects water and prevents it getting into the machine. If you have a compressor with a built in ‘dryer’, this won’t be such a risk, but it is still worth checking periodically. Water ingress will prematurely damage the bead breaker cylinder first, and subsequently damage other components |
Unscrew the bowl and release the water |
This is very subjective dependent on the environment. A nice modern workshop with a built in dryer from the compressor and insulated building could probably be checked annually. However, a very busy tyre shop, in an old building with lots of humidity and basic compressor needs to be checked daily |
|
Bead Breaker Arm Piston Rod bolt and nut |
These do come loose with use, and it is normally quite obvious as the bead breaker arm becomes to ‘droop’. It isn’t healthy as it affects the angle the bead is broken at (which is very specifically set) and then just results in more pressure on the machine and more attempts to break the bead by the operator. Eventually the hole that the pin goes through will start to wear into an oval and, at that point, it become a completely new bead breaker arm if you’re lucky. If you aren’t lucky, it may have damaged the bead breaker cylinder due to the misaligned piston rod as a result. |
Simply go to the pin at the back of the bead breaker arm where it meets the bracket welded to the chassis, and tighten |
Again, it is a visual check more than anything to determine if it needs doing, but it does no harm to tighten once a month even if there is no obvious drooping of the arm |
|
Demount Head or ‘Duckhead’ |
This part is crucial as it comes into contact with the rim, or rather it shouldn’t if set up properly. It you set it too far away, it can stretch the bead of the tyre and put strain on other components. If it is too close it can scratch the rim. If the bolt underneath is loose it can eventually fall out, normally during the removal process and can cause serious damage. |
There are normally, sometimes 4, grubscrews located to the front and/or rear of the head, and these will visibly adjust the head to the rim. You need to set the head against the rim so it is locked, and make these adjustments until you see approx. 2-3 mm clearance between the head and the rim edge. Underneath there is a bolt to tighten that secures the head to the vertical arm. |
Once again, this is volume related, and really it is common sense to visually check, but there is no harm in doing this every week. |
|
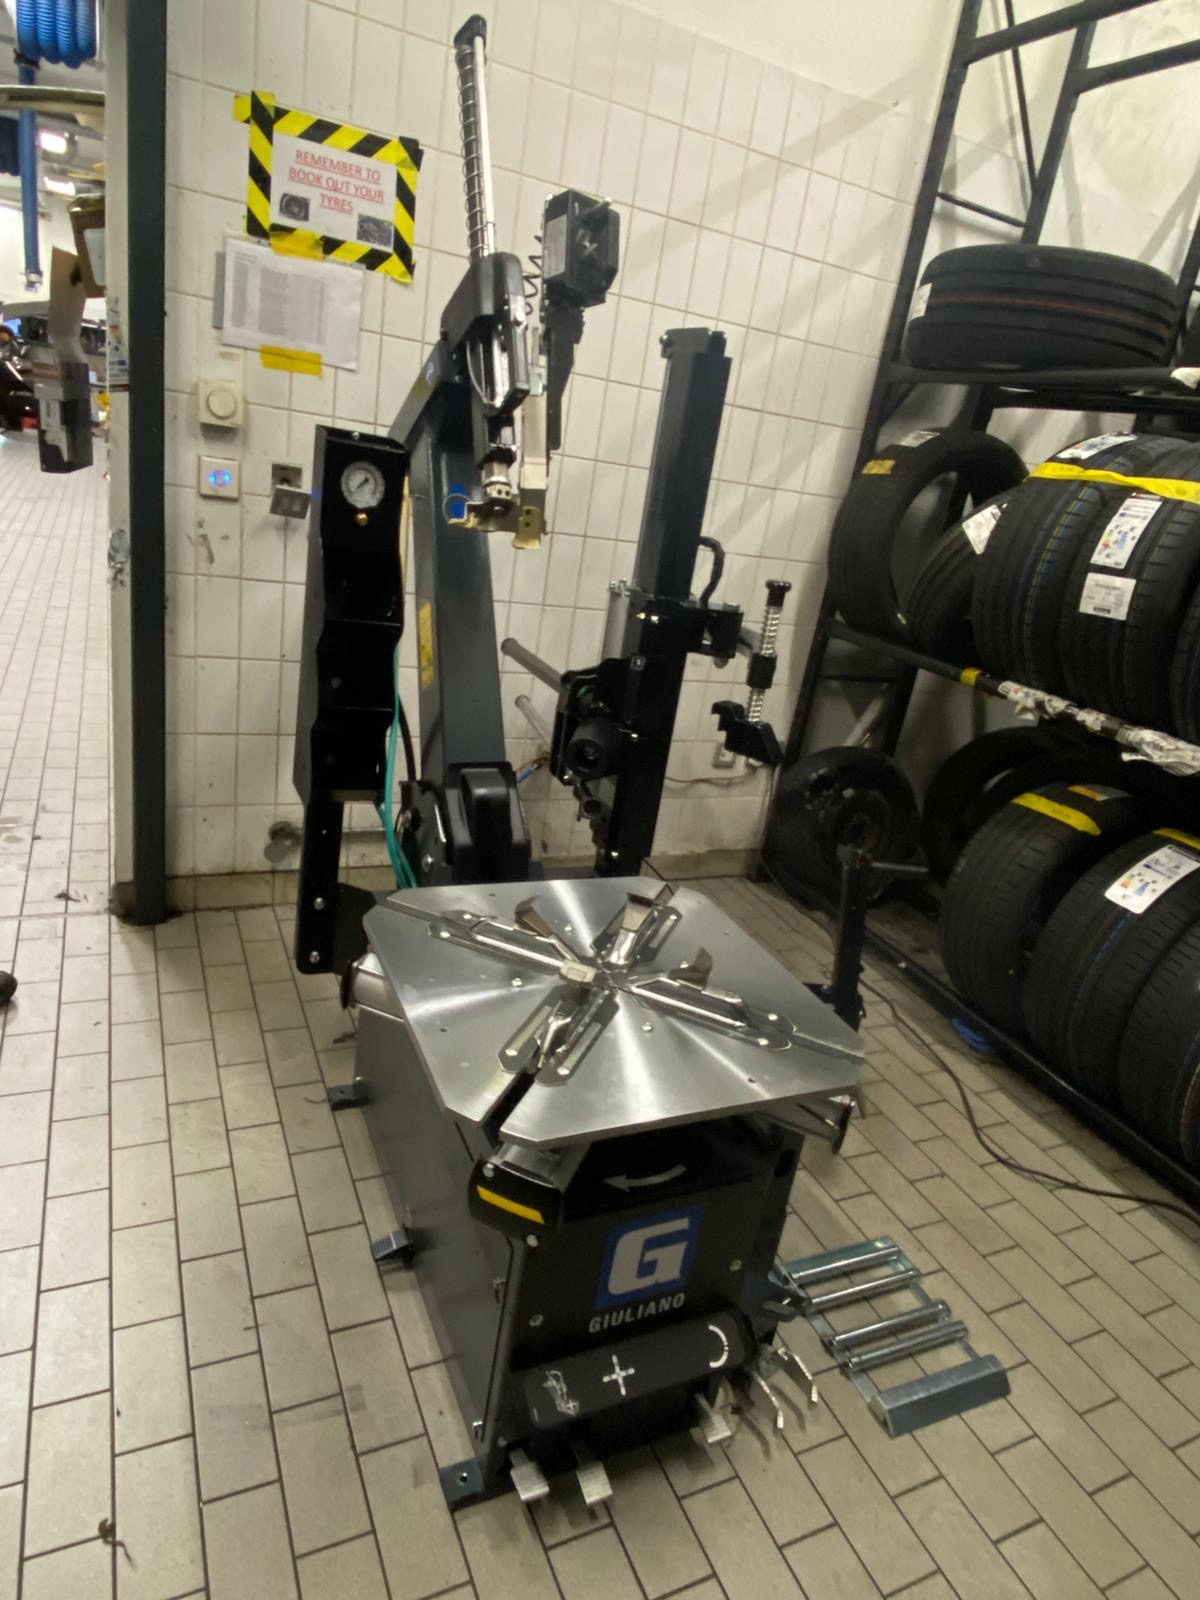
Turntable |
The turntable is a hugely integral part of the process and operation and it is important it is maintained to ensure the clamps remain concentric and that the cylinders underneath aren’t damaged |
Ensure the turntable is cleaned with a good degreasing agent, and visually check to make sure there are no valves or wheel weights stuck in any of the components or spaces around the turntable area. Also ensure that the carriages holding the clamping cylinders are tight, and that the bolts holding the clamping jaws are secure |
We would suggest every 2 weeks |
|
Drive Belt |
Inside the chassis there is an easily seen and located drive belt coming from the motor pulley, this obviously impacts the effectiveness of the turntable rotation as well as noise and vibration |
Simply adjust the belt tension until it feels taught. It doesn’t need to be measured or forced, just as long as there is no slack |
Every month |
Of course, the simplest and, arguably, the most sensible way to look after this investment is to use the supplier to attend on a 6 or even 12-monthly basis.
At Giuliano Automotive, we have specialist tyre equipment technicians who know tyre-fitting and removal products inside out, top to bottom, and who will often spot issues before they happen.
So if you’d rather we just take care of this for you, please give us a call on 01733 920 440.